
We gathered 15 skoolie build tips for building a school bus conversion. From skoolie floor plan features to options with utilities to knowing how much rust a school bus can have – here are a bunch of tips for building a skoolie to help prevent you from potentially wasting time and money.
Tips to Build a Skoolie
We built the Skoolie Livin bus and went through countless hours of research to successfully convert the school bus into a tiny house on wheels. Since starting the Skoolie Livin blog, we have also engaged with numerous other skoolie owners on different things they’ve encountered when buying a school bus to convert, building a skoolie, and looking to accomplish some unique concepts with their skoolies.
Although this list might not be comprehensive, the items on this list will highlight some of the items we recommend paying attention to when buying and building a skoolie. Selfishly, this list also acts as a personal extension of our blog to remind us of these skoolie build tips if/when we decide to do another school bus conversion.
The overall goal is to help you not waste money that often occurs through making mistakes during the planning, buying, and build stages of your school bus conversion project, while also providing some additional resources for you to get more information.
Let’s dive in!
Note: This article may contain affiliate links, which means we may receive a commission if you click a link and purchase something we have recommended at no additional cost to you. Please check our privacy policy for more details. Thanks for checking out our website and for your support!
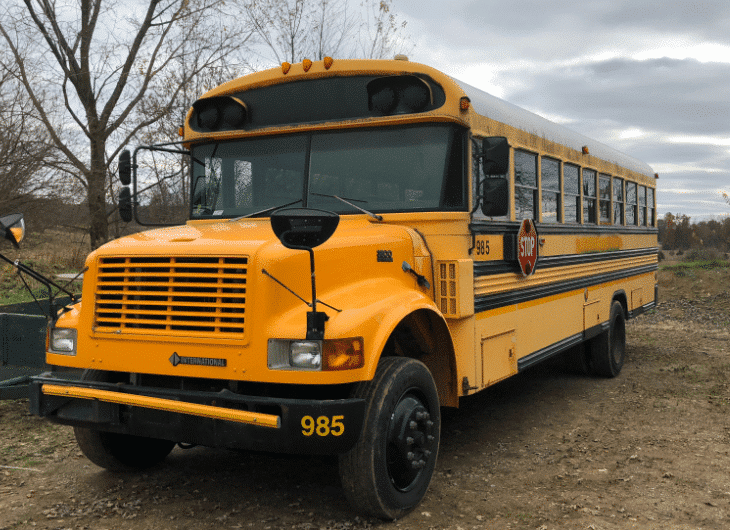
1) Select the Best School Bus Size to Convert
The best school bus size to convert is very subjective and depends highly on your goals with your skoolie, how many people (and kids?) might be living in it, if you will be living in it full-time or using it for weekend getaways, and many other factors. Because this is very different for each person, the following tips are a general rule of thumb to help get you on the right path.
Short Bus Skoolie
The most agile skoolies are the shorter skoolies with 4-6 windows. A short bus is from 20 – 25 feet in length. This makes it a perfect choice for those looking to be able to go and park anywhere a larger truck can park. However, you are going to have to sacrifice some features that you might be able to build in a larger-sized school bus conversion, such as a separate shower and toilet room, kitchen counter space, a larger-sized bed, closet space, and some fridge and freezer space.
Check out these short bus conversion floor plan layouts if you are thinking about going with a short bus.
Mid-Sized Skoolie
Mid-sized skoolies with 7-9 windows benefit from the added space but begin to have the disadvantage of taking up more space when trying to park. A mid-sized school bus is from 25 – 35 feet in length. Although you can get almost every feature commonly found in larger skoolies into a mid-sized skoolie, you will be much more compact in design. You would have to eliminate some features to have an open design concept.
Full-Sized Skoolie
Large, full-sized skoolies with 10+ windows benefit from having enough space to do various floor plans but are the most limited places to park when traveling. A full-size school bus is any bus over 35 feet long, with most between 40 – 42 feet in length. With a full-size skoolie you can get very creative. Some pack in many different features and skoolie storage options, while others make a more open concept skoolie.
Skoolie Livin Bus Size Quiz!
We created a quiz to help you find the right skoolie size!
Very simple (15 minutes or less) based on your desired lifestyle, skoolie interior styles, and a few basic questions.
We highly recommend taking this quiz if you have no idea what size bus you need to figure this out. If you already know the bus size you need, then taking this can help you see if you are on the right track!
For more inspiration on which sized school bus, you should get based on layouts, check out the Top 15 School Bus Conversion Design Ideas.
2) Find a Good Deal on a Used School Bus
It is essential to spend time trying to find a good deal on a used school bus that is the best you can get within your price range.
How Much Does a Used School Bus Cost?
A used school bus costs between $1,000 to $25,000 or more. The cost of a used school bus depends on the age of the school bus and the number of passengers it is capable of holding.
Many other fundamental car-buying factors are at play, too. The amount of rust, number of miles on the school bus, mechanical problems, and life remaining on the tires, since tires are a major expense for maintaining a school bus.
3) Does a Short Bus Cost Less Than a Full-Size Bus?
You would think a larger school bus costs more than a smaller bus, but the opposite is true. There is more demand for smaller buses.
Here is a good rule of thumb: the smaller the school bus, the higher the cost.
This is because not only are many incoming skoolie owners looking for smaller skoolies to reduce their overall build cost and increase agility, they are less common than larger school buses. Many people outside the skoolie market are looking for smaller school buses to use as work trucks, mobile boutiques, and other uses. Finally, mid-sized school buses are extremely limited, especially if you are looking for a specific configuration or model of bus.
We fought through this limitation to find our 9-window school bus.
In general, when you are looking for a used school bus for sale to convert into a skoolie, we would recommend staying in the range of $4,000 to $9,000. This price range will most likely keep you from paying too much and getting ripped off while also keeping you away from the rusty headache buses unless you have some connection to tap into to find a clean, rust-free bus for less money or search hard to find a good one at a decent price!
Check out the current Used School Bus For Sale listings category on Skoolie Livin Classifieds.
Build a Skoolie Conversion Budget
It is very easy to go way over your skoolie budget if you didn’t create a detailed budget in the first place or don’t track your spending and strictly follow it.
We planned on spending $20,000 on a school bus conversion. Still, we went several thousand dollars over our skoolie budget plan as we added features, finishing touches, and more robust systems to go off-grid indefinitely.
The most expensive items in a school bus conversion are:
- Building Materials: (plywood, 2×4 studs, insulation, etc.) $3,000 – $5,000+
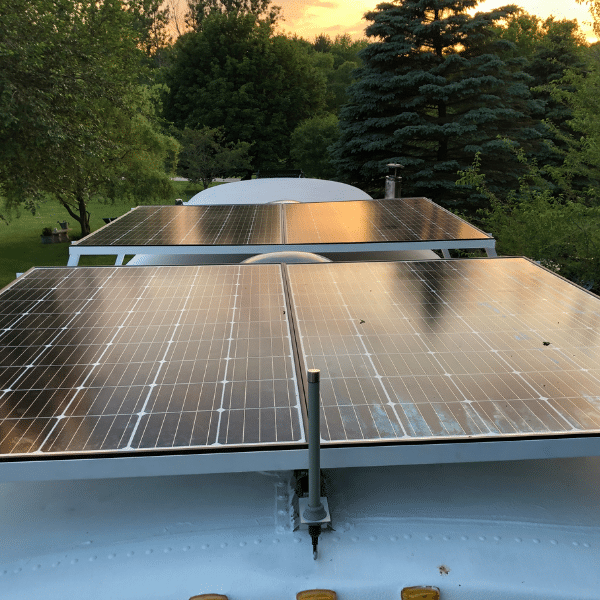
- Electrical: (especially a larger solar system) $1,000 – $5,000+
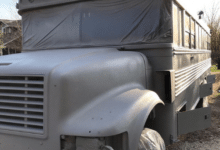
- Exterior Paint: (In most states, a bus can’t stay yellow.) $1,000 – $3,000
- Heating Systems: (Cubic Mini wood stove, RV furnace, etc.) $400 – $2,000
- Skoolie Refrigerator: $200 – $1,200
- Toilet: $200 – 1,000
Check out just how much our school bus conversion cost was here.
4) Search for School Buses For Sale Often
When searching for a school bus to convert into a skoolie, Craigslist, and eBay Motors are the first places most people go. However, you can easily fall into the trap of looking at some bad options or have trouble weeding through all the different listings. Finding a suitable bus by just looking at pictures is a battle, which can be very difficult.
There are many more efficient ways to find the perfect school bus that you can turn into a skoolie, or even find a completed school bus conversion that you can buy and move into.
We created a complete Guide to Finding a Good School Bus for Sale that explains the best ways to navigate through finding your school bus to convert.
5) Act Fast on a Good School Bus
We have noticed that good school buses for sale will sell fast!
We went to see several school buses when we were searching for our bus that either already had an offer and money down on it or people were coming after us to check it out. The bus we purchased had someone coming to check it out the same day after us, so we put money down to hold it and didn’t take a chance of losing it. The bus we checked out before this one we bought was down in southern Indiana, and it had money down from another buyer. The other buyer kept delaying the seller from paying the rest and picking it up, so he returned it to the market.
The school bus conversion market is growing fast. If you follow #4 and search for school buses often, you will have a better chance of finding the school buses for sale than most others. However, you should be ready to put money down or buy the school bus outright when you find the bus that is perfect for you. Don’t hesitate! It could be gone by the time you text or call back the seller to make an offer.
This does not mean making an offer at first sight. Do your due diligence, as discussed in the next few tips.
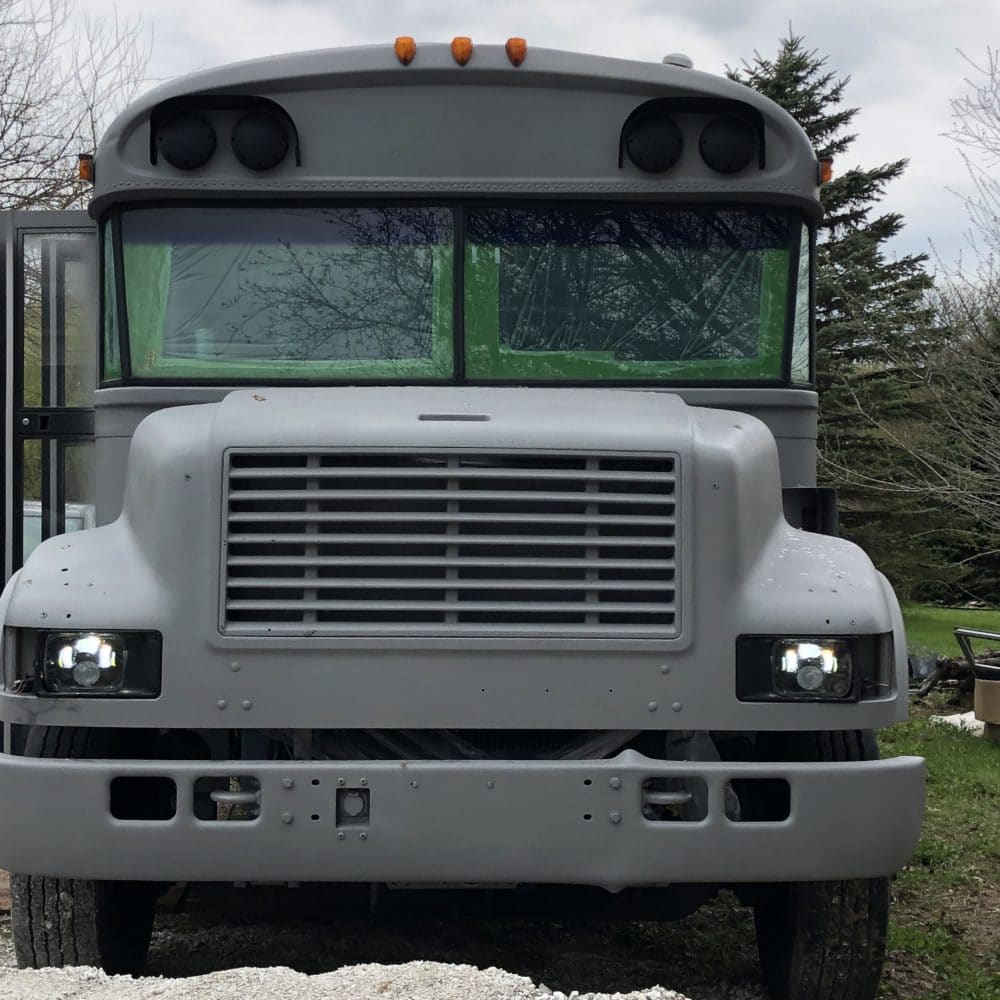
6) Check for Rust… Everywhere!
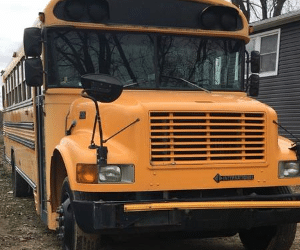
When we decided to transition into skoolie living, we were excited to get out and see our first skoolie for sale. We were so excited that we traveled to the not-so-good side of town to see what turned out to be a rusty nightmare.
The Good: it was registered as an RV already and was a Bluebird TC1000 with nice headroom inside. The exterior looks nice, as you can see in the picture.
The Bad: High mileage, had recently broken down, and was priced at $7,000.
The Ugly: Lots and lots of rust. Rust holes went through the wheel wells into the bus cab, where you could see the water-stained bottom of the carpet. The entire frame and floor supports were rusty.
That’s when I realized what “rust” really was. There is a difference between automobile-eating rust and cosmetic surface rust. Generally, cosmetic surface rust can be treated and won’t harm much. Automobile-eating rust can be deadly for a vehicle. Oftentimes, it can go unseen and grow underneath the layers of paint on a school bus. It will eat away metal quickly. One of the signs to look for is bubbles that look like cyst bumps growing under the paint, holes, flaking rust, or paint chipping.
If you plan on building a skoolie to sell it for a profit down the road, you want to make sure it is rust-free and do everything you can to keep rust from forming. If you want to build a skoolie to tour around for a few short years and then park it, you could handle a bit more rust. When in doubt, keep looking – a better bus will come along.
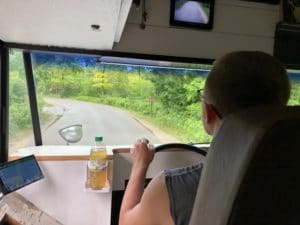
7) Driving a School Bus Without a CDL
It is illegal to drive a school bus without a CDL, but only if you are using it as a school bus with the intention to operate it as a school bus to transfer people for an organization or for some other commercial use. You technically cannot be driving a registered school bus on the road if you do not have a CDL.
However, if you are buying it and just driving it home where it will be converted and eventually registered as a motorhome, as is the case for most skoolie owners, then you are sort of in a grey area.
So here is what we did…
When we bought our school bus and drove it home, we had our insurance papers in the bus that said we were going to use it for storing items (Progressive method in the next section) and Sarah followed me in her car. We had a good explanation outlined for what we planned on doing with the bus in-case we got pulled over for some reason (like for how I didn’t turn on the running lights). That’s about it.
We drove at 60 mph the 250 miles back to my parents’ property and made it back without any issue.
Was it legal? That’s questionable. The outcome, if we were pulled over, would have depended on the police officer that we happened to cross paths with.
The only other better way is to find someone that does have a CDL to come with you and drive the school bus home to make sure you are safe, but this can be challenging for many people.
This might not be the answer you want, but converting and living in a skoolie – you learn nothing is clear cut, easy, and straight forward. There is a good deal of risk involved, but sometimes you just have to get as prepared as possible and go for it!
Also, we just wrote up a new article that has good insight on what it is like driving a finished skoolie.
8) Getting Skoolie Insurance
I work in Search Engine Marketing, so I used some of my tools and found that “skoolie insurance” and “how to get skoolie insurance,” along with several other related terms, are heavily searched for by skoolie owners on the internet. This is due to insurance being a hard hurdle for us skoolie owners to jump since not many companies are willing to insure a school bus conversion if it not professionally done.
First, almost no company will give you school bus conversion insurance if you just have a raw school bus. You’ll even have a harder time getting insurance if it is not registered as a motorhome yet.
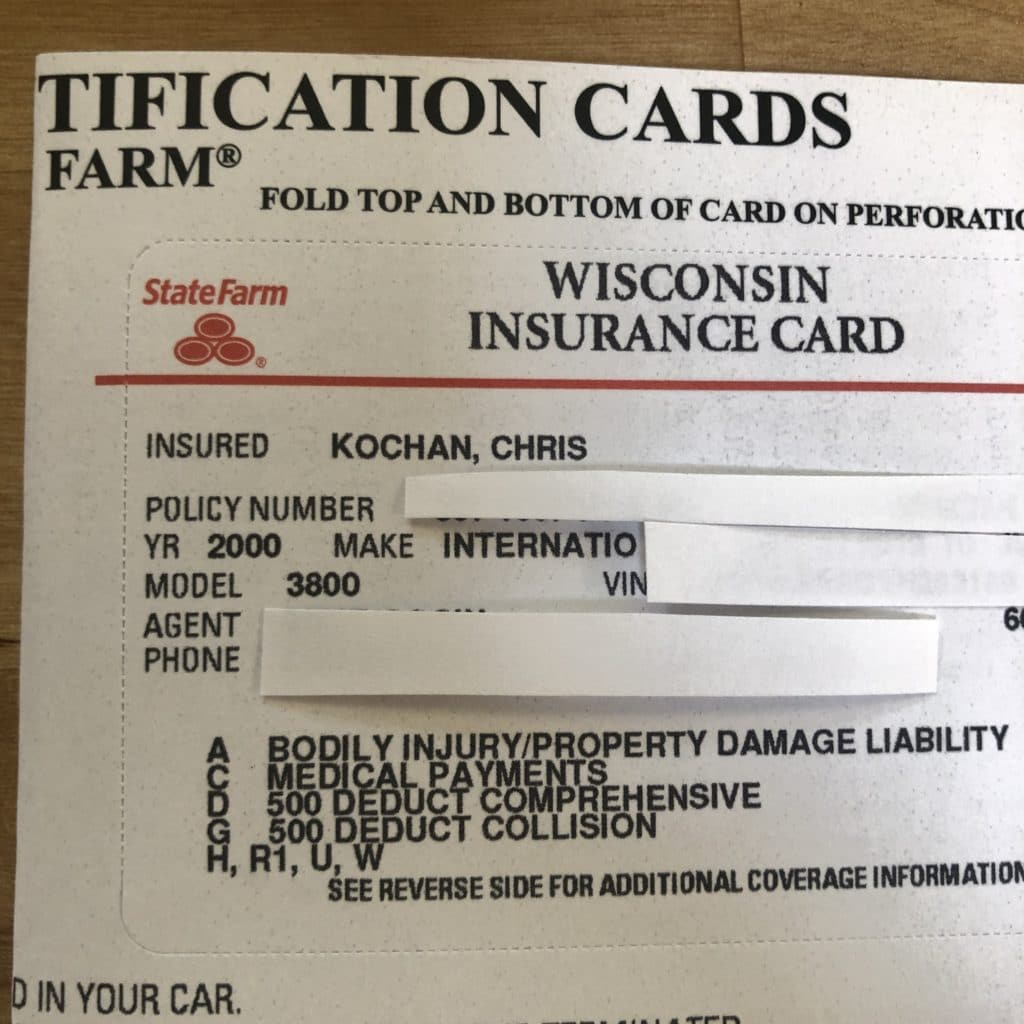
In most states, State Farm Insurance has become the go-to company for skoolie insurance, but they will generally only insure a school bus conversion once the conversion is “complete.” This is especially true if you are looking for full coverage of your conversion costs, as they will require many pictures of the interior and exterior.
“Complete” as in the pictures you take everything looks complete event though you might have projects left to do. Our skoolie was about 80% complete when we got our State Farm policy.
But, we did get some insurance for our school bus when we bought it in order to drive it home 250 miles from Michigan.
Insruance for Buying a School Bus to Convert
When we bought our bus, we went with Progressive and told them we were buying the bus to park it on our property and use it as a storage unit. This gave us insurance for the value of the bus itself, liability coverage for the ride home, and to drive it within 100 miles of our home parking location. We kept this until the conversion was complete, just in-case we made a catastrophic mistake while doing the build so we could recoup some of the $4,000 we spent on the bus. We also went to the DMV right away and registered it as a commercial vehicle for personal use.
Full Coverage Skoolie Insurance
After the bus was about 80% complete and had all of Wisconsin DMV requirements to register to being a motorhome, including a State Patrol Officer inspecting the bus to ensure it was repainted and all school bus functioning items (lights, stopsign, etc) were taken off, we got it registered and called up State Farm.
We now have full coverage skoolie insurance, including the overall school bus conversion costs, with great liability insurance and the freedom to travel where and when we want.
Read our full school bus conversion skoolie insurance guide.
9) Draw Too Many Floor Plans
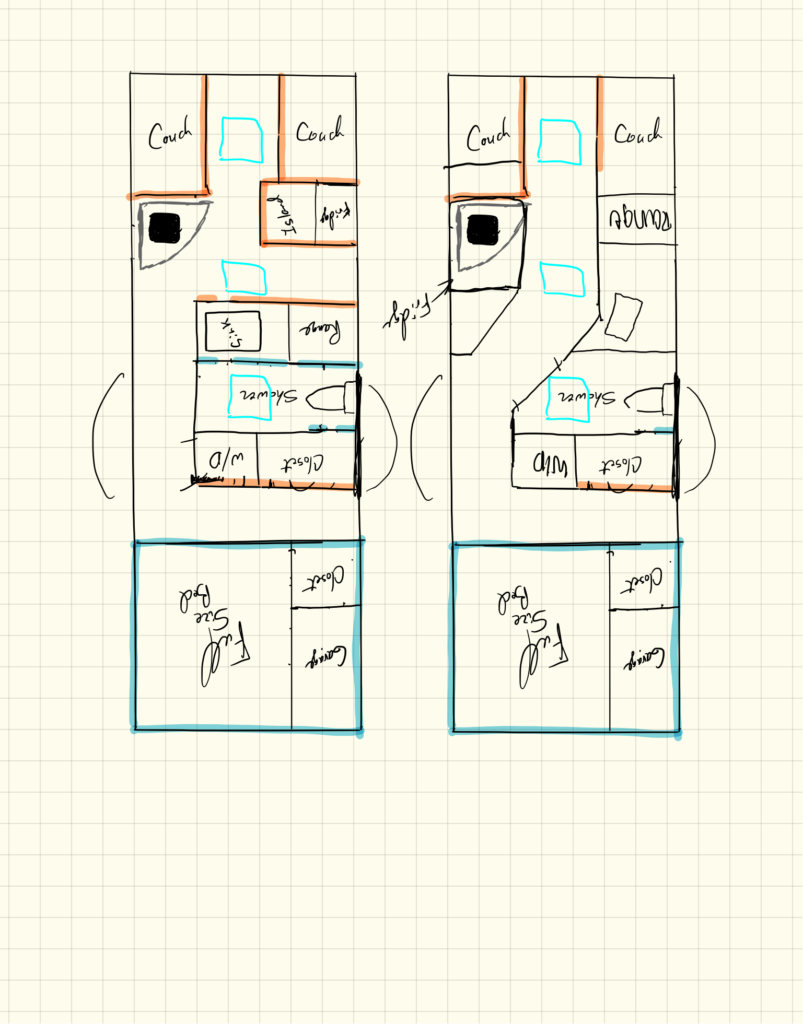
We couldn’t count how many skoolie design drawings we created. Even when we first started considering the idea of living in a skoolie, we were drawing up skoolie plans for every bus we thought might have the slightest chance of being the one.
We highly recommend getting in the habit of drawing up skoolie floor plans as soon as you start planning to build a skoolie. This is one of the most important skoolie build tips that will help spur creativity, help you make decisions of what size school bus to buy, and create a habit of always looking at things in different ways. This is an important skill when trying to build your skoolie, since you will run into many problems that require a good amount of creativity to solve.
Plus, it is fun drawing up and designing your future skoolie.
Check out our full DIY Skoolie Floor Plan Design Guide.
10) Tape Out Your Skoolie Floor Plan
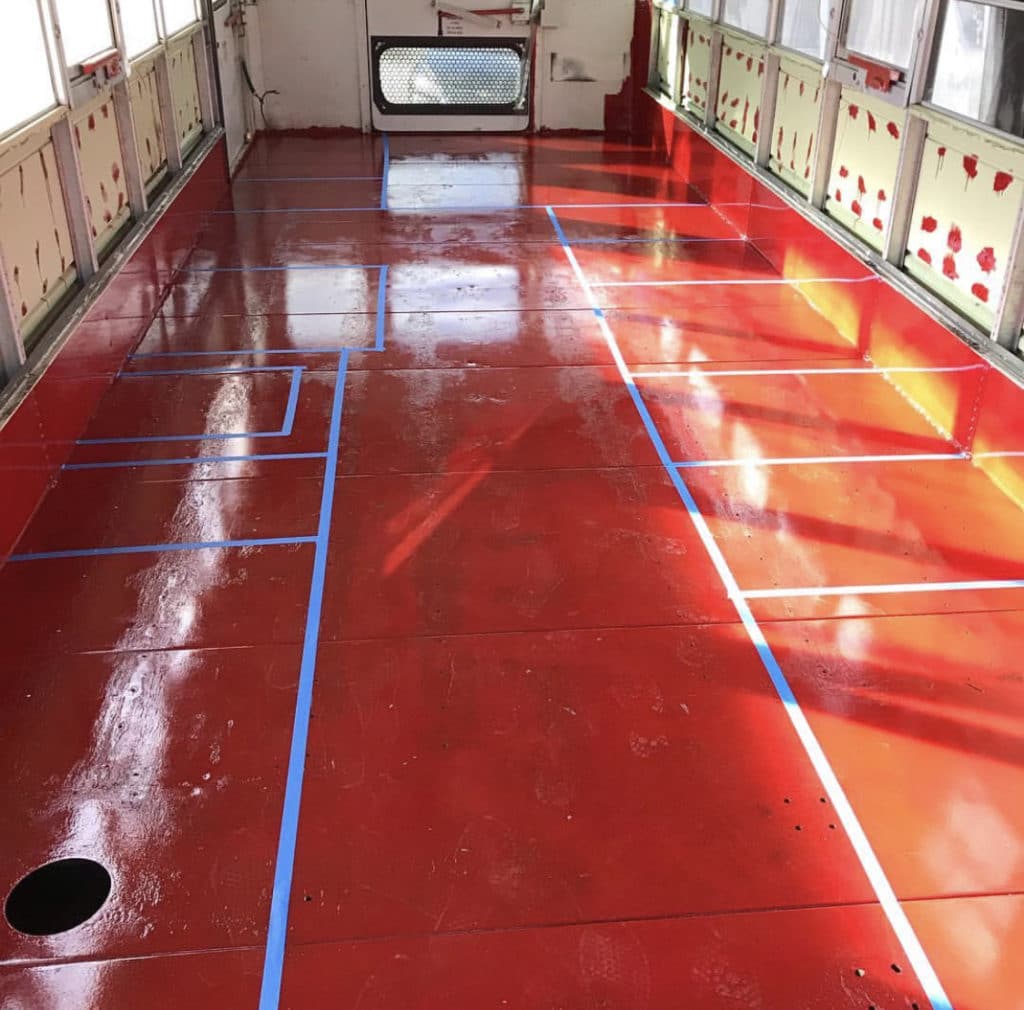
One of the most fun things to do once you decide on the size of bus and figure out your budget is to draw up your skoolie floor plan. Drawing up a plan on paper, on a computer, or on an iPad is a great exercise, but you won’t know the true spacing of items and get a feel for it until you tape out the plan on the floor, either in an open space or in the school bus itself.
You will want to make sure your skoolie kitchen, appliances, couch, entertainment area, desk and table areas, skoolie bathroom, and all the other items you want to include in your basic layout of the skoolie floor plan have enough space. This can help prevent a good amount of wasted time and money by allowing you to make changes to your design before purchasing or building different items that may not necessarily work with your specific skoolie design.
11) Visit a Tiny House
One of the best things you can do is plan a trip over a weekend to attend a tiny house show. There are tiny house shows all over the world happening throughout the year. Going to one of these shows will give you good idea of what you can expect owning and/or living in a skoolie.
12) Stay in a Skoolie Airbnb
Like Airbnb apartments, condos and houses, there are skoolie bnbs for rent, too. We would suggest renting a skoolie bnb over a long weekend, or potentially even a week or two, so to really experience what it was like living in a skoolie.
This is one thing we wish we would have done is to try to stay in a skoolie bnb for rent. Doing this would not have changed our decision to build a skoolie or much of our skoolie layout since we optimized it as we built the skoolie, but it would have been a good experience and shortened the learning curve of building and living in a skoolie.
Check out these awesome skoolie Airbnbs.
13) Buy Good Skoolie Insulation
If you are like us living in a cold environment a good portion of time when visiting family in northern states (we’re from Wisconsin), or you plan on being in really warm states – you are going to want to buy good skoolie insulation.
After all of our research, we found the best skoolie insulation option to be spray foam insulation. We specifically went with this Dow Froth Pak spray foam that covers 650 sqft an inch thick per kit. Since we did the two long walls, the full-back wall, and the entire ceiling in this spray foam insulation, we went through 3 packs.
With spray foam, it is more expensive up-front, but you’ll save yourself having to create a separate moisture barrier as the spray foam acts as a moisture barrier and you will be much better off in the extreme cold and hot climates. We lasted through sub-zero temperatures with only our Cubic Mini wood stove and running this Suburban RV propane heater when we weren’t burning the fire.
To learn more about insulation types, check out our review of the Best Skoolie Insulation Options.
14) Add Skylights & Vents
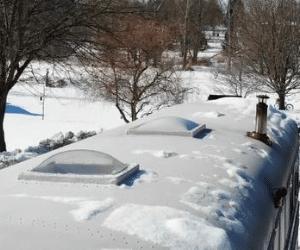
If you are planning to cap skoolie windows, you are going to want more light. Blocking off windows can make sections of the bus will be dark. This is especially true if you are like us and got a bus with tinted windows. Even if you plan to not cap any windows or put in skylights, it is still a good idea to put in skylights to make the skoolie feel more open.
We decided to put a skylight in the emergency hatch of our school bus, while also putting one near the front of the bus about two windows behind the driver seat. This window up-front was to brighten up our couch and desk area. We had bought a third skylight to put back above the bed, which we feel we should still install even a small one above the bed, as it can be as dark as a cave with our insulated curtains up. It makes it hard to wake up early!
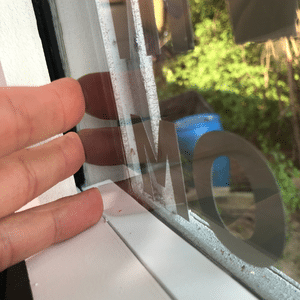
We will also be installing a vent into the roof of our skoolie this spring. After living through one skoolie winter, we got the lesson on skoolie school bus windows sweating. Having a fan-powered vent would help with airing out the skoolie every few days in order to clear out the moisture in a school bus that can build up.
Additional Information
15) Join a Skoolie Build Community

This is probably the best skoolie build tip that will impact the memories of your skoolie build.
The best memories from building the skoolie were the days we spent collaborating and working with other people. Whether it was messaging people on Instagram or asking family to help us with a step in the build. The relationships made and memories gained along the journey to build a school bus conversion are a big part of taking on this journey. Even after it is “done,” the skoolie community is amazing to be a part of.
With that said, we have our new Skoolie Livin Community where we have several hundred people already signed up as Members who are in various stages of their build.
Click Here to become a Skoolie Livin Community Member Today!
Hopefully these tips to building a school bus conversion will help you jumpstart your skoolie build and help save you money down the road by preventing some common mistakes made by people who just jump in and buy a school bus without any proper planning.


I have a few Wisconsin specific questions that I’m hoping you can help me with. But first, some background. Me and my friend are planning on converting a Skoolie after our junior and senior years in college. I go to school in Ohio, and he’s in Wisconsin. I know that Wisconsin has more relaxed laws than most states, and therefore it should be easier for licensing, registration, ect., and my friend may be able to become a permanent resident which might make things smoother. How was your experience converting a Skoolie in Wisconsin, and is there anything else that we should consider?
Thanks for your help
Hey Thomas,
Wisconsin is not that bad of a state to do a skoolie build at all, besides winter and some hoops you have to jump through. First, we simply titled our school bus as a bus to start. We did not register it right away and get plates, due to not really needing to drive it around. You will at some point need to have a State Trooper come out and verify that your school bus conversion has all of the school bus-related items (stop sign, flashing lights, etc) removed/painted over as they want to verify it does not function as a bus. There is a form MV2103 School Bus Conversion Record that you will need to have them fill out in order to get your bus registered and retitled as a motorhome.
The full requirements are actually spelled out on this Wisconsin DOT School Bus Conversion page.
Insurance is another thing… We wrote up this school bus conversion insurance guide detailing out our experiences with insurance here in Wisconsin.
Beyond the insurance and registration, finding a spot to convert it and having all the tools readily available is key. If you don’t have that, you will have a much more expensive and time-consuming build.
I would make an aggressive plan, but give yourselves at least 3 extra months (if not more) when planning out how long you might be parked to get the full conversion done. We wanted to get our bus done in about 12 months… it took us 19 months and it still isn’t completely done – although a skoolie is sort of a never-ending project.
We converted our bus outside and winters in Wisconsin can be brutal come January and February. These months we did not do any conversion work and even in March we were still thawing out, haha, so little work was done those few months over the two winters we have been through in Wisconsin.
If you have any specific questions, feel free to let us know!
– Chris
My husband and I bought our bus back in November and have been starting the slow process of accumulating as much salvaged/reclaimed materials as possible (thank you Habitat for Humanity!) Your website is great! Do you have any information on the possibility of off-gassing from the spray foam insulation you chose? VOCs are a big concern for us.
Hi Marcia,
Congrats on purchasing your bus, that’s so exciting! When spray foaming, wear a gas mask and hazmat suit. Then make sure to wait for the spray foam to fully cure before entering back into the bus. This is usually up to 24 hours after spraying, but also dependent on site conditions. We also suggest wearing a mask when trimming the insulation (after it’s fully cured) as the spray foam dust can still be harmful. Other than that, just follow the instructions to a T to keep you guys safe. I hope this helps!