5,965
Related Course
- 35 mins
Contents
ToggleSkoolie Toilet Options
The one course you need to help you decide which skoolie toilet is right for your desired skoolie lifestyle.
There are a few different ways to install solar panels on a skoolie which include simple z-brackets, using angle iron, using Unistrut, or building a custom solar panel roof rack for a skoolie.
There are different approaches to consider with each of these options which include mounting them completely flat, mounting them pitched on an angle of the roof, or being able to adjust them to follow the sun throughout the day.
The type of solar panels and size of solar panels also play into making the decision of which method you will want to use.
We will go through all of these skoolie solar panel mounting methods and options in this guide so you can pick the best option for your skoolie.
Important Note on Solar Panel Mounting Safety
The last thing you want to do is have a solar panel go flying off of the roof as you are driving. This actually happens more often than you think. Over the years, we have seen YouTube videos and posts on Instagram of this happening, which caused us to go overkill on mounting our solar panels to our room.
I wanted to make this special note on the importance of reading this article so that you do not have one of these experiences. Throughout this article, I will go through what I would do in using each method to make sure the solar panels are very secure when driving.
Best Skoolie Solar Mounting Position
Horizontally, Parallel to the Ground
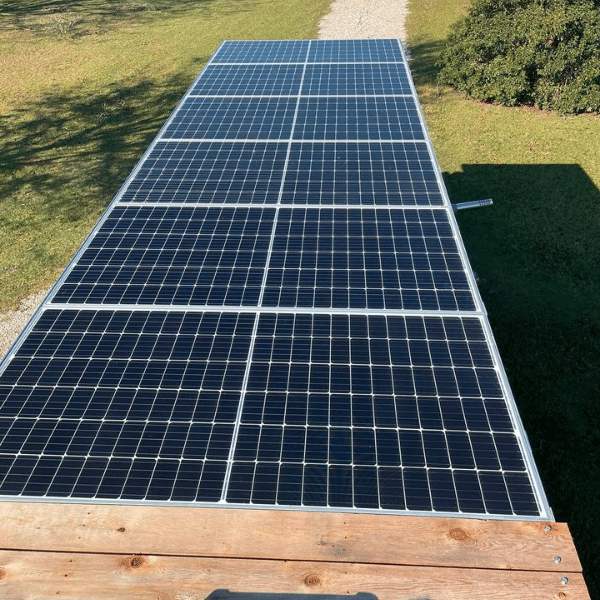
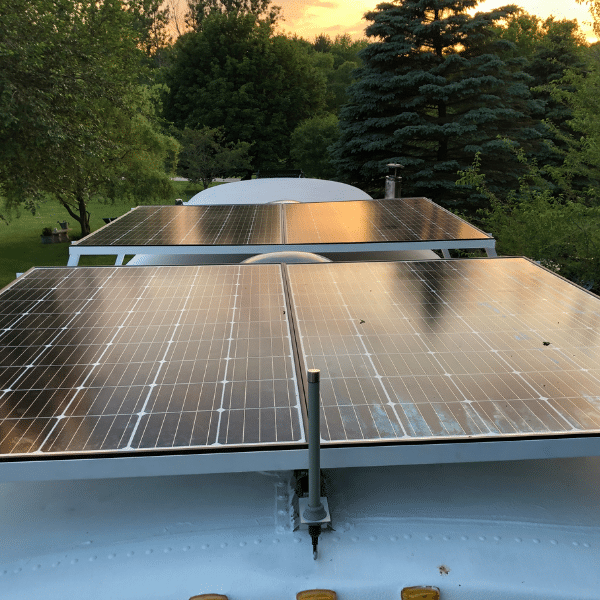
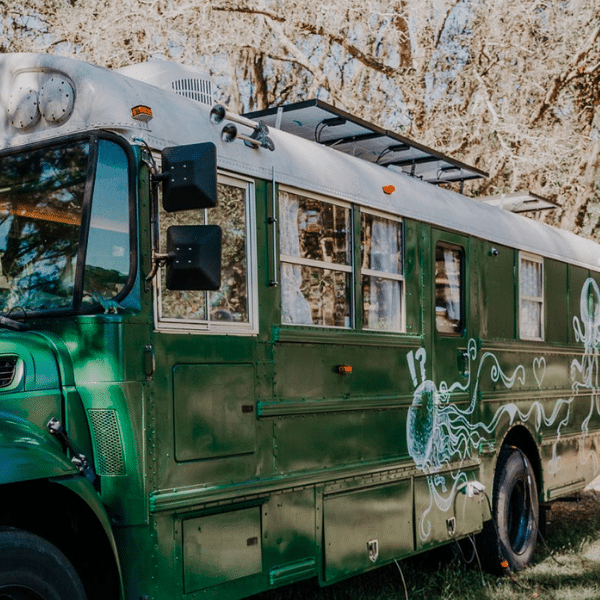
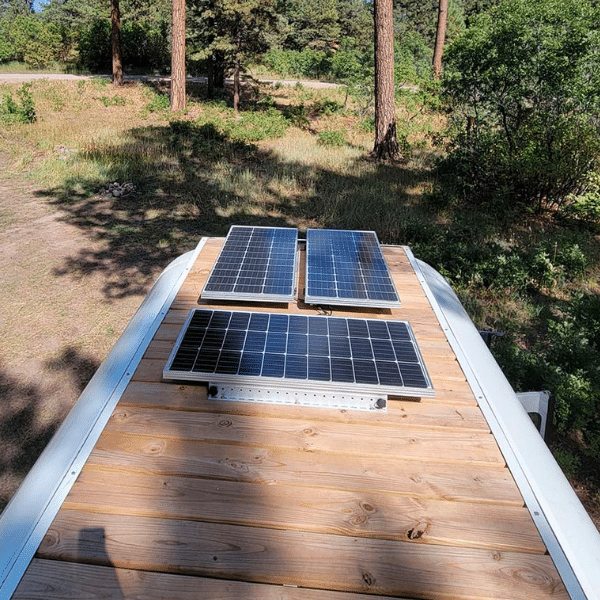
The best mounting position for solar panels on a skoolie is horizontal flat on the roof, parallel to the ground unless you plan to do some fancy hinging to point then in the direction of the sun.
Mounting solar panels completely parallel to the ground will provide maximum exposure to the sun when it is the strongest point directly overhead. When the sun is rising or setting, the solar panels will get less exposure but they will still absorb some rays.
If you scan through most of the Skoolie Livin Finished Skoolie Classifieds, you will see most of the skoolie solar panels are mounted flat on the roof or flat on top of the rooftop deck. We grabbed a few examples from the classifieds that are featured throughout this article.
Angled Along the Two Sides of the Roof
Mounting a row of solar panels along each side of the skoolie roof at an angle can be beneficial if the panels can be tilted. This way the solar panels can be adjusted to face toward either side of the skoolie depending on where the sun is located.
However, if you do not plan to tilt them throughout the day, there is a good chance these solar panels will get very limited quality sun exposure. This is because the sun will only be at the same angle as the solar panels for a period of time as it rises or sets. When the sun is overhead, it will be getting indirect sun. When the sun is on the other side of the skoolie opposite the side of the solar panels, they will not be getting enough sun to activate the solar charger.
If you plan on mounting them this way, I would highly suggest having the solar panels on the right side of the skoolie be on one solar charger and the solar panels on the left side of the skoolie be on a separate solar charger. This will ensure that the solar panels that are not in the line of the sun don’t affect the efficiency of the others that are in the direct line of the sun on the other side.
Mounting Solar Panels Before vs After Interior Build
Mounting Before Interior Build
The best option would be to mount the solar panels before you build out the interior of the skoolie. This allows you to see from the interior and use bolts with large washers or even larger pieces of sheet metal to increase the surface area underneath the body of the bus where the brackets, angle iron, u-channel, or other items you need to attach to the roof to mount the solar panels.
However, to mount solar panels this early you have to figure out many things ahead of time. Items such as electrical placement and layout of everything that will be mounted on the roof such as vent fans or a deck need to be considered. Then, you have to spend the money on solar equipment early on in the project, which electrical is one of the largest skoolie build costs. This also starts the time clock of wear and tear of the components, along with the warranties.
For all of these reasons, we decided to put off doing our solar electrical until almost the end of our build. It is much easier to do it early on, but we wanted to make sure our solar panels were fresh and ready to go when the skoolie was finally ready to hit the road. We also figured out a way to securely mount things to sheet metal and ribs of the skoolie, which we will discuss in the next section.
Mounting After Interior Build
When Sarah and I built our skoolie, the solar panels were one of the last things we added to the skoolie. Even though we had the panels for almost a year, we didn’t need to use them since we were parked where we could plug into shore power. Instead of adding wear and tear to them, we kept them in the shed until everything else was complete.
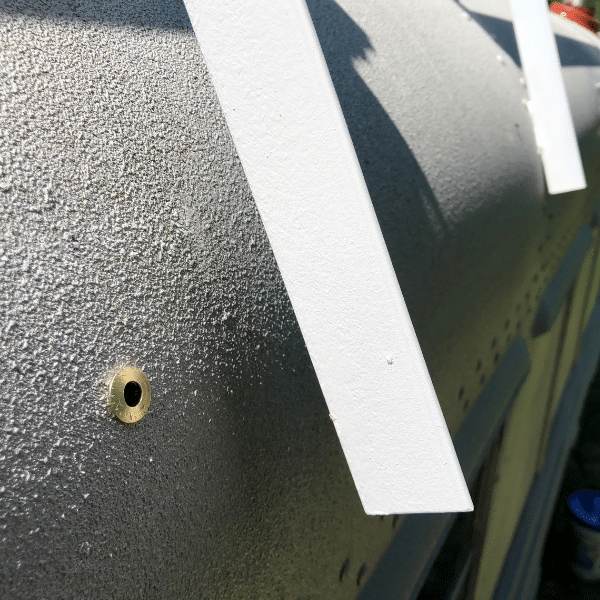
Most people think you need to use some type of aggressive self-tapping screw because once the build is complete you can’t get to the interior side of the skoolie in the ceiling to use nuts and bolds. However, there is a way to rivet in nuts on the underside of the sheet metal in the ceiling to securely mount things to the roof of the bus.
The best and easiest method we found to mount things to the sheet metal and/or school bus ribs where the rivets of the sheet metal are is to use this rivet nut set. Rivet nuts allow you to rivet in a nut right into the sheet metal, which then allows you to use bolts to mount things to the roof rather than self-tapping screws hoping the sheet metal holds by itself.
Solar Panel Mounting with z-Brackets
Mounting solar panels on a skoolie with z-brackets is the cheapest way to mount them on the roof, however, these are also the least secure method. First, the z-brackets are made out of aluminum, which is a soft metal that can flex and bend easily. Second, these z-brackets most of the time come with self-tapping screws that aren’t the best for long-term mounting, especially if potentially driving often in high winds.
If you plan on using z-brackets, I would recommend using two brackets on all four sides of the solar panel for larger solar panels. For smaller solar panels of 100W or less, one on each side should be good enough – yet I would add more if possible just to be safe. Another option is to use longer z-bracket mounts such as in this picture.
I would highly recommend not using self-tapping screws to mount solar panel brackets or other mounting hardware. The threads of these screws do not have a lot of surface area to mount into the sheet metal. Over time the high wind when driving may weaken the sheet metal where the screws are mounted, potentially ripping the panels right off the roof.
As mentioned in the previous section, I would highly recommend using bolts with rivet nuts in the sheet metal. This will ensure the bracket mounted to the skoolie is strong and will not be a point of failure with heavy gusts of wind consistently hitting the panels.
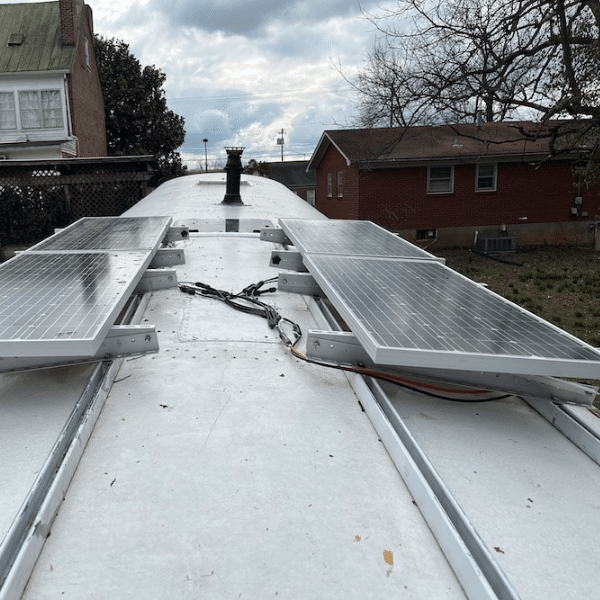
Solar Panel Mounting with Angle Iron
Angle iron can be used to mount to the sides of the solar panels, then use rivet nuts to bolt the angle iron to the roof. Steel angle iron is much more sturdy than the stamped z-brackets, providing a much more secure mount to the roof of a skoolie.
However, angle iron is made of steel that will rust. You will want to paint it with Rustoleum paint to ensure it is protected from rusting.
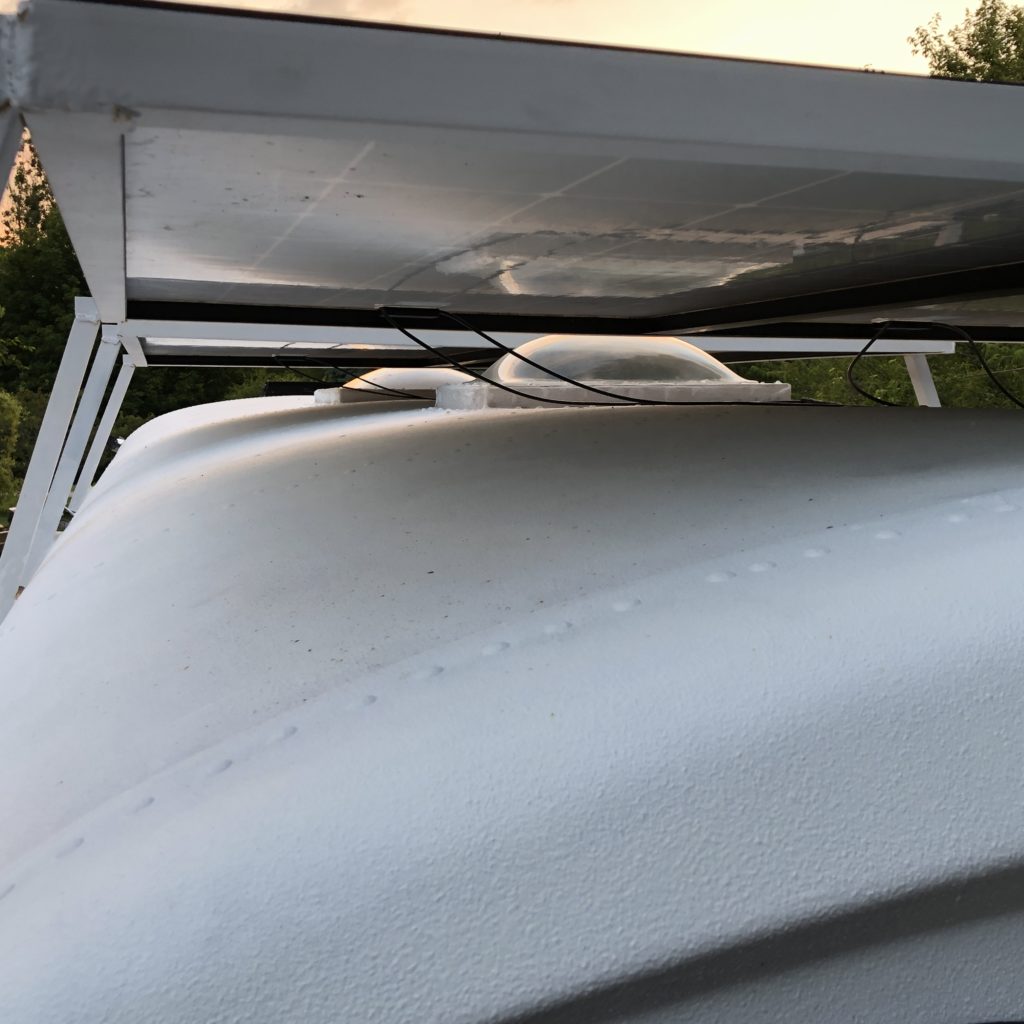
Unistrut Skoolie Solar Panel Mounting
Unistrut provides a way to be much more versatile with the roof of your skoolie, since the base Unistrut channels will be mounted to the top of the skoolie and can be bolted to all of the thick ribs of the bus. Then anything mounted onto the Unistrut channels can be moved and adjusted as needed.
There are many attachments and mounting brackets for u-channel that can allow you to not only mount solar panels, but also a deck, luggage storage containers, snowboard/ski rackers, kayak holders, and much more.
U-channel can be mounted to the roof of a skoolie using bolts and rivet nuts. Then use these Unistrut spring nuts to bold the solar panels to the Unistrut. We have also seen these end clamps used to lock in solar panels onto the Unistrut channel.
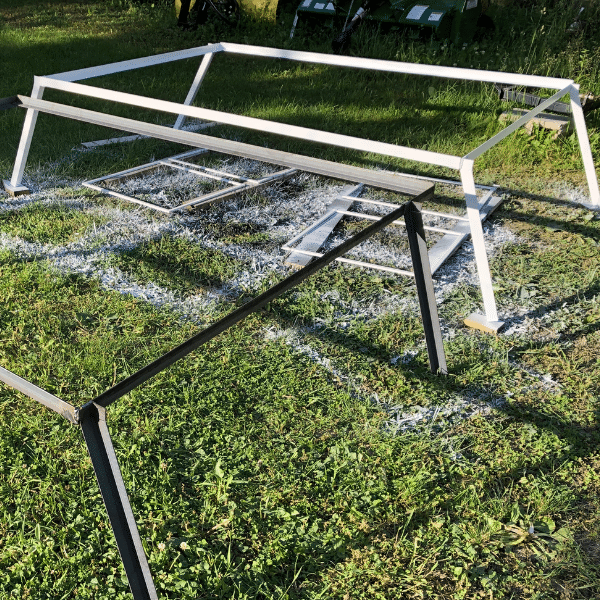
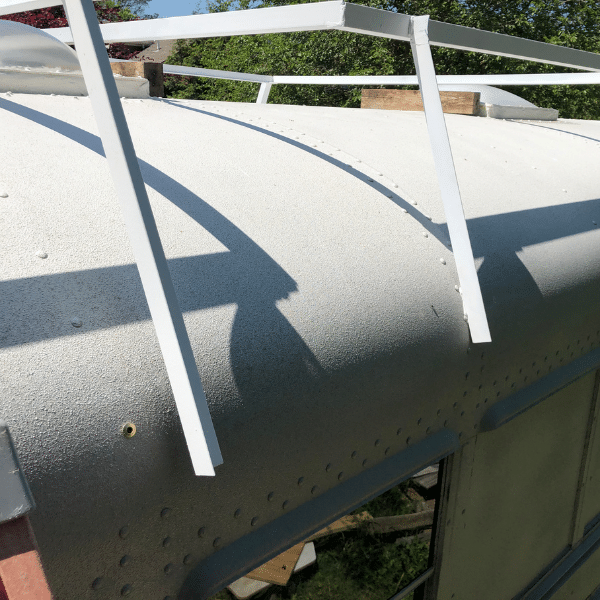
Custom Solar Panel Roof Rack
Building a custom solar panel roof rack for a skoolie can be one of the most secure ways to mount solar panels to the roof of a skoolie since you can ensure everything is welded and mounted to the degree that feels safe.
This can be done using a combination of the methods above, as well as innovating with other solutions as more options become available.
When we built custom skoolie solar panel racks for our skoolie, we welded the entire rack that was fit to the bus. These were then painted with Rustoleum and then mounted using two rivet nuts per and 1/4″ bolts.
Join the Skoolie Livin Community!
Related Course
Skoolie Toilet Options
Get the complete overview of skoolie toilet options to help you decide which one is right for your desired skoolie lifestyle.
- 35 mins