3,147
Related Course
- 35 mins
Contents
ToggleSkoolie Toilet Options
The one course you need to help you decide which skoolie toilet is right for your desired skoolie lifestyle.
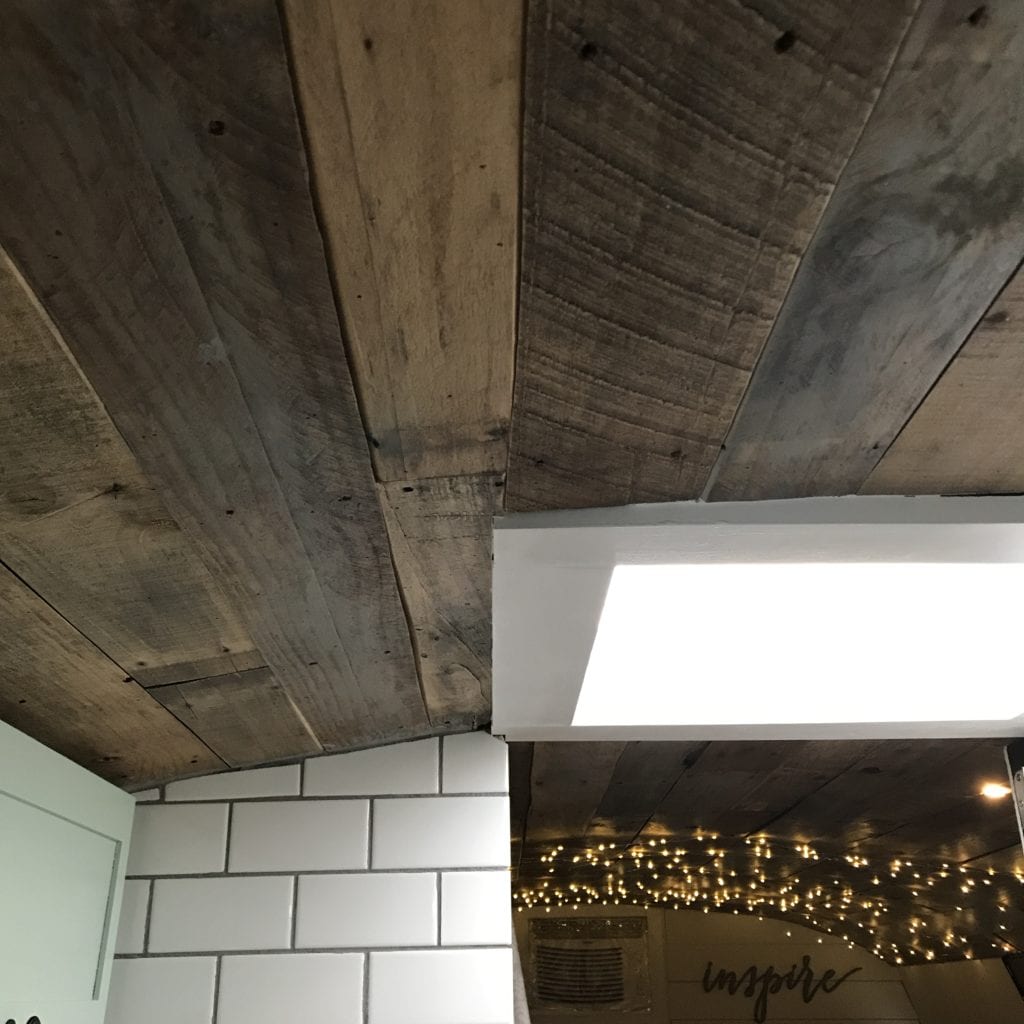
We knew finishing our skoolie ceiling had the possibility to be very expensive depending on how we wanted to finish it. There’s so many skoolie ceiling options – tongue and groove planks, skinny shiplap, tin tile, cedar planks, even painting the existing ceiling. We figured the tongue and groove and cedar planks were going to be pretty expensive. So for our skoolie ceiling material, we decided to do old pallet wood! I knew we could find some cheap or even free and we would just be spending money on stain, polyurethane, and nails.
With the roof being curved and these pallet boards being pretty skinny, we knew we could make it work to finish our skoolie pallet ceiling and that it would be a great skoolie ceiling material.
We found a huge pile of pallets on Craigslist. We reached out and this guy owned a roofing company and they were wanting to get rid of all their pallets. So we got to pick out the ones we wanted for no charge. I think we even went to pick them up before we bought the bus!
Although it was fairly cheap to do our skoolie ceiling, it wasn’t as easy as it seems. Let’s check out why we chose this as our skoolie ceiling material!
Special Note: This article does have affiliate links. If you click a link and happen to make a purchase, we may receive a small commission at no cost to you. Thanks for your support – this commission helps us to continue educating the skoolie community!
Things to Think About When Working With Pallets
These old pallets are just that, old and have been transporting lots of different materials, so it’s important to know where these pallets have been and where they came from. After all, you are putting these in your house! The most important thing to think about when picking your pallets is where they came from and if they were sprayed with chemicals or not. This article provides an in depth look at pallet safety. It goes through all the different stamps they put on pallets and what these stamps mean. They also talk about which pallets are completely not safe and those are MB pallets, standing for methyl bromide. Check out the article and they will go into further detail about the toxicity of those pallets, and which pallets are completely safe to use!
How to Make a Pallet Ceiling For a School Bus Conversion
Here is what you need and how to make your own skoolie pallet ceiling for your school bus conversion ceiling.
Supplies Needed:
Here is what you need and how to make your own skoolie pallet ceiling for your school bus conversion ceiling.
- Pallets
- Sawzall
- PPE (gloves, safety glasses, & face masks)
- Table Saw
- Palm Sander (optional)
- Wood Stain
- Staining Rags
- Water Based Polyurethane
- Paint Brushes
- Nail Gun with Nails
- Liquid Nails (optional)
1) Getting the Boards Off the Pallet
This first step definitely took us the longest to figure out – how to get the boards off the pallets. We tried prying out the nails, we tried drilling a few holes next to the nails to take the pressure off, we tried it all. Ultimately, I would rather keep the nails in the boards than having a bunch of holes in all of the boards. Then, we tried a sawzall and this worked great with the exception of a lot of elbow grease. Thankfully, Chris, my Dad, & I were able to take turns. Make sure you wear working gloves and safety glasses since the wood is very rough and the nails could come flying out at any minute, when you are cutting the boards.
2) Running the Boards Through Table Saw at 45°
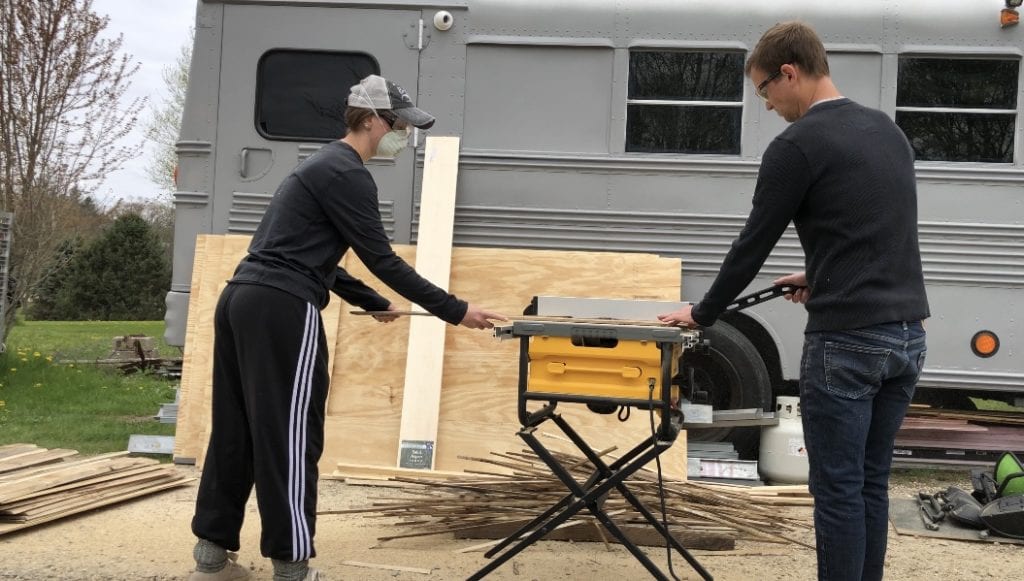
In order for the boards to curve with the roof, we cut all of them at 45° through a table saw on one side, so they would line up and you wouldn’t be able to see the plywood behind it. They were put up alternating between the front and the back across the width of the bus. This worked like a dream and we wouldn’t have done it any other way! If we did not cut them at 45° there would be little gaps in between all of the pallet boards, while the ceiling curves and the pallets do not.
3) Sanding (If You Want Pallet Wood Smooth)
The pallet boards we got were pretty rough and for only having about 6″ between our heads and our skoolie ceiling, I wanted the pallets to be smooth. I did not want any slivers from these boards, so I got on my working gloves again and hand sanded them all! If you want your pallets smooth, I definitely recommend using a palm sander!
4) Staining
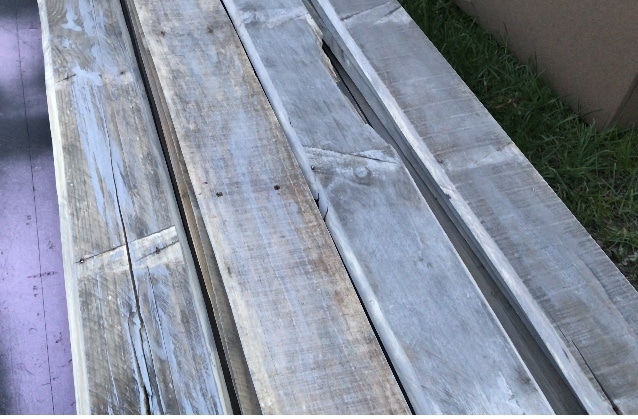
I wanted the wood a little bit lighter so we went with the Sunbleached Varathane by Rustoleum. You can get it here on Amazon. I stained half the boards, only with this stain. The other half I left raw. That way when we hung them, it’s a mixture of stained and raw boards and they’re all different! To stain the boards, I used these these rags from Amazon. Then, I lightly dipped it in the stain & gently wiped it across the boards.
5) Sealing
I wanted to make sure the boards were sealed really good for our skoolie pallet ceiling. The best thing that we found to seal these pallet boards is polyurethane. We went with the water based polyurethane over the oil based because I didn’t want the sealant to change the color of the pallet wood. So these are completely sealed and they still look like the original wood! You can get this water based polyurethane here on Amazon. I think I did about 3 coats on each side of these pallets, but you can do however many you want. I just wanted to make sure they were completely sealed and nothing would come crawling out of them. So far, they have held up great!
6) Hanging
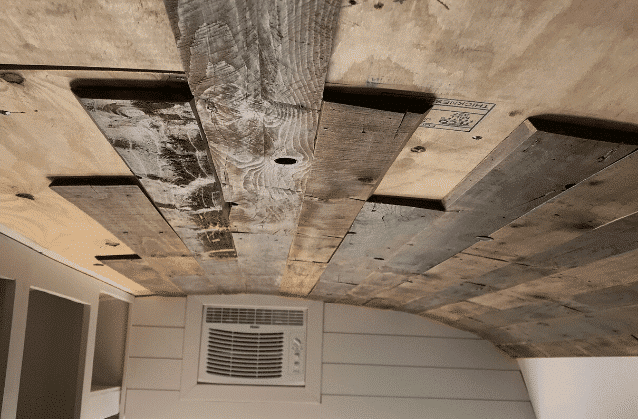
So what is behind these pallet boards and how are they going to hold up?
Behind our finishing pallet boards for our skoolie ceiling is 1/4″ thick finished plywood and behind that is spray foam insulation. The plywood is screwed into the ribs of the bus. We used the plywood so we were able to nail these pallet boards directly to the ceiling and they would stay put.
One of the most important things to do when hanging your pallets is to make sure you enough of the same size width of the boards to span the length of the bus. Also, make sure those boards are going the same way from when you cut the 45° angle. So you have multiple of the same size front boards as well as back boards. These front and back boards will alternate throughout the width of the bus. Then, we placed them on the ceiling and added a bunch of nails in the boards to hold them up. You could also glue them up with liquid nails and then nail them into the ceiling to really make sure these pallet boards aren’t going anywhere.
And during this step, we had to figure out where to cut our holes for our ceiling lights! Then, we used 3/4″ drill bit (specific to our lights) to make the holes for the lights, pulled down the wires and soldered the wires with the wires of the lights together and popped them in the ceiling.
That’s how we made our skoolie ceiling with pallets as our skoolie ceiling material! Let us know what you did for your skoolie ceiling material in the comments!
Join the Skoolie Livin Community!
Related Course
Skoolie Toilet Options
Get the complete overview of skoolie toilet options to help you decide which one is right for your desired skoolie lifestyle.
- 35 mins